Friday, February 26, 2016

Super Charlotte

Do you ever take on a project that ends up being so much larger than you planned?

A few days ago I promised my daughter that I would make her a new super hero mask from felt.  Her much loved mask made from construction paper and painters tape was in bad shape.  Additional layers of tape were not working to hold it together.

My plan was to go to the fabric store after a doctor's appointment, buy a square or two of felt and crank out the mask before dinnertime.

Silly me.

Charlotte left the doctor's office with a Captain America sticker and quickly pointed out to me that she "had to have" the hat, shirt, gloves and boots.  I was feeling crafty so I agreed.

We didn't get the uniform made in time for dinner, but in the end it only took a few hours to put together.


My tutorial for making a super hero costume like mine without a pattern follows.

I used:

18"x36" piece of blue felt
18"x24" piece of red felt
scraps of white felt (some stiff and some soft if you have it)

My child is 3.  A costume for an older child will require more fabric (especially the blue felt).

First I made the cuffs.  I cut a template from paper and measured it against my daughter's wrists and ankles.  It was a little small so I folded the template in half and cut it on a folded piece of felt, leaving an extra inch between the fold of the fabric and the fold of the template.


Next I sewed velcro vertically along the outer edges of the cuff just before the fabric angled out (see photo below for placement).  I held the fabric up against my daughter's wrists and ankles first to determine the best place for the velcro.

I used sew on velcro instead of adhesive because I thought it would hold up better to the extreme needs of a 3 year old super hero.


Next came the helmet (mask? hat?).

My vast experience with construction paper masks has taught me that eye and nose placement are critical.  The eyes always need to be larger than you think.  I started my template by cutting a notch for the nose in the middle of the long edge of a piece of paper.

Next I held the template to my daughters face (she was very patient that day) and figured out where the eyes should be.  I cut and measured again.  Then I made the eyes larger (of course).  Finally I rounded out the top.


I cut two pieces of blue felt from this template.  The first was cut the size of the entire template (the front of the helmet).  The second was cut the size of the top 2/3 of the template stopping around where the eyes start (the back of the helmet)

I cut out little wings from a scrap of very stiff white felt.  If you don't have stiff felt you could try sewing together a couple layers of softer felt and/or using fusible interfacing.

I cut an initial from soft white felt and top stitched it onto the front of the helmet above the eyes.

I pinned the font and back front sides together.  I inserted the wings between the layers about half way up the straight part of the side. I stitched the pieces together with an 1/8" seam and turned it right side out.  Cute, right?


Finally, I made the shirt.  I wanted something that could be easily put on so I decided it should be loose and open on the sides.

First I used a tank top as a template for the front and back pieces.


I widened the neck a bit.  I cut two little rectangles for the shoulders and two little red squares because I had red thread in my machine and was too lazy to change it.

I cut a star from a scrap of soft white felt and topstitched it to the front.

I sewed the tabs between the front and back shoulders by topstitching a square on the red felt squares.


That's it!  Easy and fast!

The Empress would not pose for a proper photo so this is the best I can do for model shots.


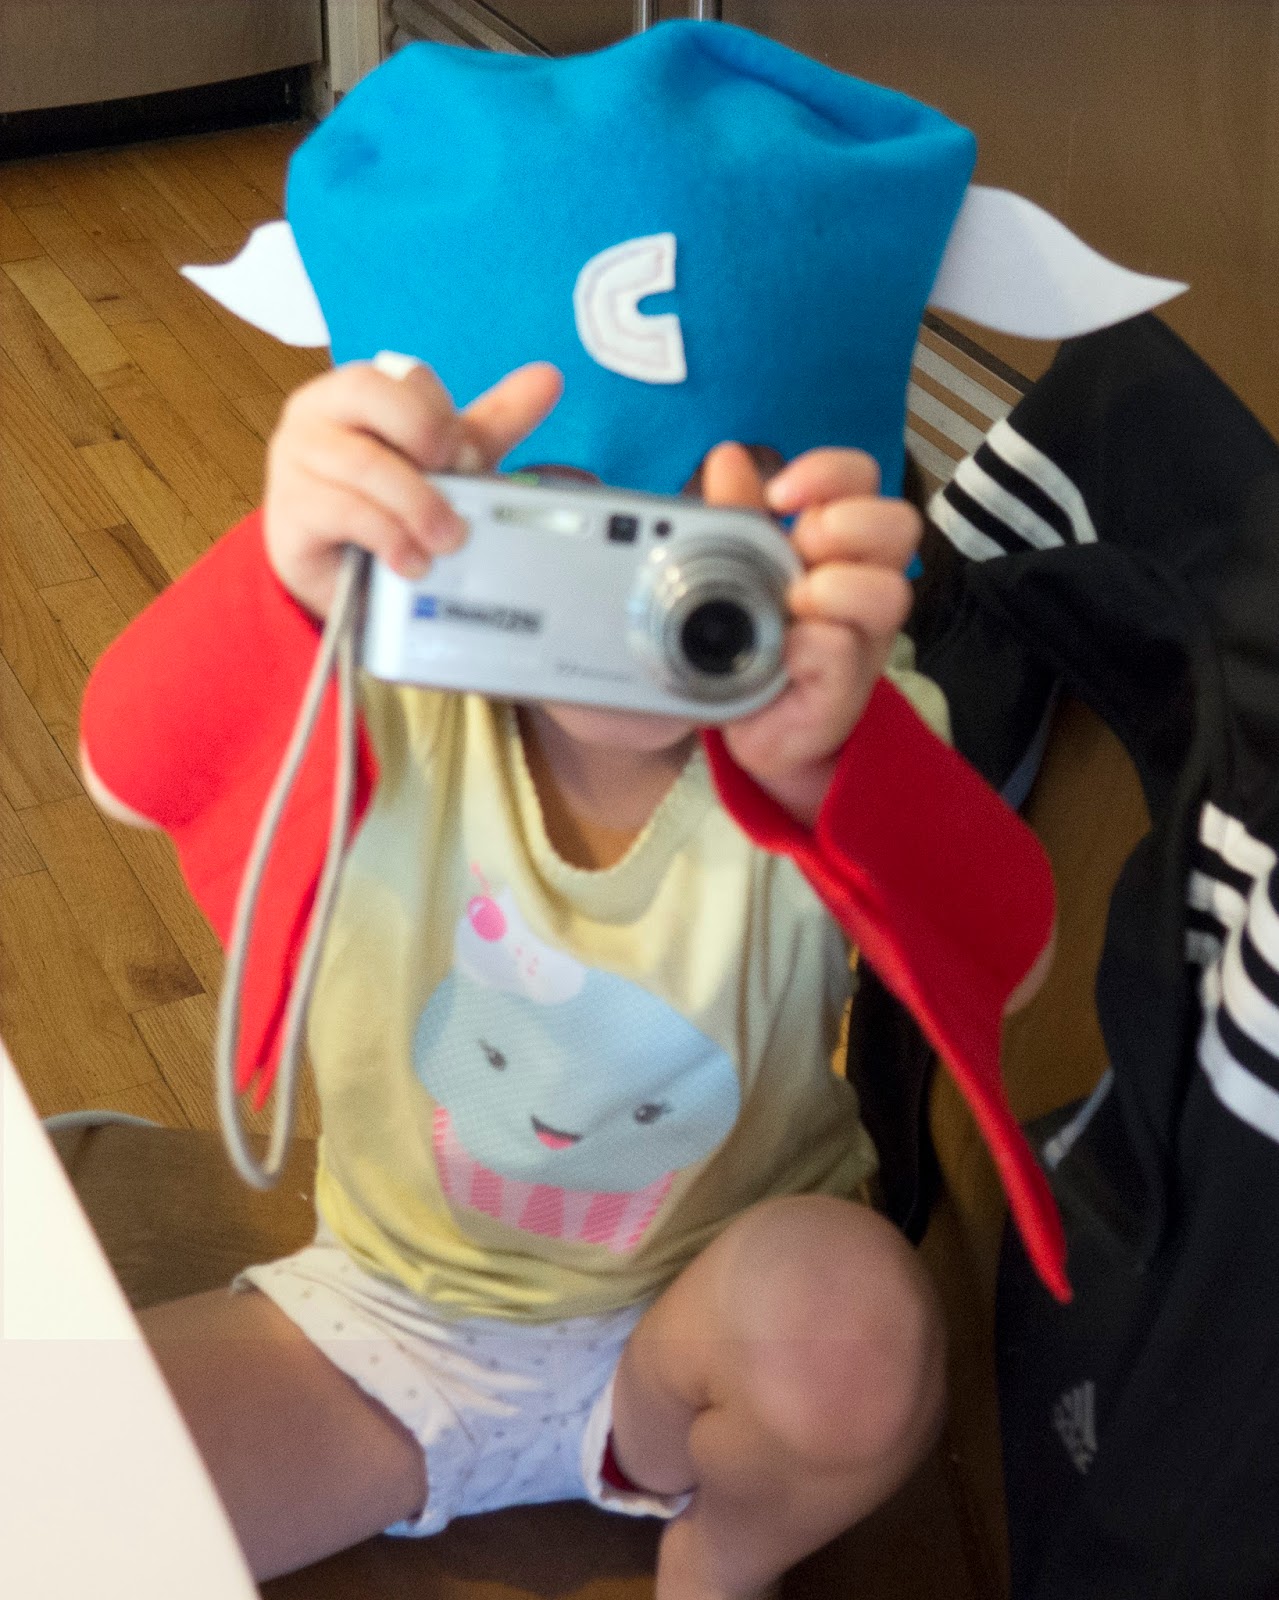
I hope you try to make your own super hero costume.  Now that I know how quick and easy it is to sew with felt I will do it more often.

I'm linked up with:
Sew Fresh Quilts
Crazy Mom Quilts
Fort Worth Fabric Studio
Sew Can She
Funky Polkadot Giraffe

Wednesday, February 24, 2016

Block 13

Block 13 is 6"x8".  That makes it the last of the 8" blocks and the first of the 6" blocks.


This block uses half square triangles.  Again I used a random number generator to determine the placement and fabric choice for each triangle.

And here's a look at my design wall.  This isn't the final placement of the blocks but you can see how they all work together.


So far so good!

Fabrics used:
Starlight in Nightfall (Rhoda Ruth by Elizabeth Hartman)
Geometric XOXO in Indigo (Simply Colorful 2 by Moda Fabrics)
Kona Solid in Slate (by Robert Kaufman)

I'm linked up with:
My Quilt Infatuation
Sew Fresh Quilts
Crazy Mom Quilts
Fort Worth Fabric Studio
Sew Can She

Wednesday, February 17, 2016

Blocks 11 and 12


Block 11 is a modernized Churn Dash block.  It measures 8" square.  I cut everything freehand for an irregular look.


I quite like this little block.  I think I might make an entire quilt of Churn Dash blocks.  Perhaps with something cute fussy cut in the middle?

Block 12 is a log cabin block.  At first I thought I might attempt a smaller version of my Oops! quilt but I decided it would lose too much detail shrunk down to an 8" block.


These strips were cut without a ruler.  I'm getting better at cutting straight lines freehand so I'm going to have to start intentionally cutting crooked lines on these freehand blocks!

Next week (lucky 13) is the final 8" block.  After that I move on to 6" which hopefully will speed things up.

Fabrics used:
Kona Solid in Bluegrass (by Robert Kaufman)
Atomic Flux in Alloy (Utopia by AGF)
Henna in Aqua (Eden by Tula Pink)
Kona Solid in Cabbage (by Robert Kaufman)
Mini Pearl Bracelets in Rocket (by Lizzy House)
Chelsea in Leaf (Highline by Free Spirit Fabrics)
Drawn Stripe in Leaf (Carkai by Carolyn Friedlander)
Pure Elements Solid in Light Grey (by AGF)

Monday, February 15, 2016

Book Review - Rosie's Family, An Adoption Story

(this post contains affiliate links but the opinions are 100% mine)

This post is off topic for this blog but I'm so happy to have found this book that I wanted to share it!


Rosie's Family is a story about a puppy who was adopted by a family who does not look like her.  Rosie's parents explain what adoption is and Rosie talks about all of the emotions she experiences as she tries to understand her adoption.  It is written from the perspective of a child who does not remember her birth parents and who is part of a family who does not look like her.

Our 3 1/2 year old is so interested in this book.  While she's a bit young to really understand what adoption is we can tell that she is starting the process of learning about her past when we read this book together.

From other reviews I can see that this book was a good fit for many adoptive families.  I think it especially works for children of international adoption.

The book spends some time talking about why Rosie's birth parents gave her up.  Rosie's parents explain that her birth parents were unable to care for her and made the brave and loving decision to give her up for adoption.  Some reviewers of this book found that explanation to be problematic for children adopted out of troubled homes.  So Rosie's Family may not be the right book for all families.    But it is the right book for our family.

If you've ever looked for a children's book about adoption you know how hard it can be to find a book that's well written and fits your situation.  Rosie's Family is the first book I've found that I enjoy reading and that I don't have to "rewrite" to fit our situation.  I've ordered a few extra copies to donate to our preschool and to share with extended family.

I recommend this book to anyone in a similar situation who wants to talk about adoption with a preschool or kindergarten aged child.  I think its relevant for children who are adopted, their siblings, cousins, and friends.

If you have any books to recommend about adoption I'd love to hear about them!

Sunday, February 14, 2016

Happy Valentine's Day

Happy Valentine's Day!

This quilted Valentines Day card was a gift to my husband in 2014.  It was the year of our twentieth (gulp) anniversary.


The card is 5"x7" and is sewn and quilted by hand.

I originally wrote about this little quilt on www.farmerinthevale.com.

Wednesday, February 10, 2016

Blocks 9 and 10

Block 9 is another exercise in randomness.  I chose the size of the blocks and the fabric placement using a random number generator.


I don't love this block as a stand alone but next to the other blocks it works well.  It adds a little dash of asymmetry to an area of the quilt heavy with highly structured blocks.

Block 10 is a square-in-a-square.


I made a lot of these blocks in 2015 including my square in a square baby quilt and many UFOs.  It was a relief to only have to sew one this time around!

Fabrics used:
Doily Web in Mustard (Spellbound by Cotton + Steel)
Pasture Lines in Pickle (Carkai by Carolyn Friedlander)
Kona Solid in Corn Yellow (by Robert Kaufman)
Collar Ends in Bronze (Artisan by AGF)
Four Corners - Weave in Gold (Riley Blake Designs)

I'm linked up with:
My Quilt Infatuation
Fort Worth Fabrics
Blossom Heart Quilts

Wednesday, February 3, 2016

Blocks 7 and 8

After last week's arrow block and curved piecing I decided to take it easy.  Big blocks and straight seams only this week!

Block 7 is simple strips.  It took less than an hour to design and sew.  Yay!


Block 8 is little bit of fun with half square triangles.  Matching up all those corners is not my strength but this one came out OK.


I was really struggling to photograph this set of yellow-green fabrics.  It's so much prettier than what was showing up in the photo.  Luckily a discovered a trick to get my photos to come out nicely.

Fabrics used:
Henna in Aqua (Eden by Tula Pink)
Kona Solid in Cabbage (by Robert Kaufman)
Chelsea in Leaf (Highline by Free Spirit Fabrics)
Doily Web in Mustard (Spellbound by Cotton + Steel)
Pasture Lines in Pickle (Carkai by Carolyn Friedlander)
Drawn Stripe in Leaf (Carkai by Carolyn Friedlander)
Pure Elements Solid in Light Grey (by AGF)

I'm linked up with:
Freshly Pieced
My Quilt Infatuation
Fort Worth Fabric Studio
Crazy Mom Quilts
Sew Can She
Confessions of a Fabric Addict

Monday, February 1, 2016

How to Sew Improv X and O Blocks

Blocks 4 and 6 of my modern sampler quilt are improv X and O blocks.  I learned the technique for sewing improv curves at the last BAMQG retreat.  The quilt I made with those squares is currently sitting in my UFO pile.

The nice thing about sewing improv curves is that its very forgiving.  Even so, I suggest trying a test block first to get the hang of cutting the curves.

My finished blocks are 8.5"x8.5" and my instructions will make 2 blocks.

Start by cutting a total of eight 6" squares of at least 3 different fabrics.  Stack them right sides up in groups of two.  By that I mean put the right side of one square together with the wrong side of the other square.  Each stack of two should contain two different fabrics.


If you want to make a finished block that's a different size you can easily adjust the size of your starting block.  Simply divide the size of your finished block (minus seam allowance) in half and add 2 inches.  So for a 12" finished block, your starting blocks would be 8".

Now for the fun/scary part!  From each stack cut a quarter circle (see photo) starting about 2" from the corners.


Don't make your curves too sharp (or square) or it will be difficult to sew.  See an example at the end of this post.

The final blocks look best if there in variation in the way you cut each curve.

Next is the trick bit - pinning and sewing the curves.  For each stack of two, pair up the inner piece of one color with the outer piece of the other color.  With right sides together pin at the mid point.  Then pin the remaining bits of the edges together.


As you can see from the photo, I put the "inner" piece on the bottom and the "outer" piece on the top. I found that sewing that way results in a much smoother curve.  See a not so sucessful example at the end of this post.

As you sew, you may find that the pins are "off."  That is that the edges no longer match up well.  Don't worry, just remove your pins and keep sewing, lining up your edges as you go.  This will keep your seam flat.  Since you will trim off a fair amount of fabric at the end it's OK if the pieces move around a bit.

Press your square flat turning the seam allowance toward the outer piece (it will naturally want to go that way).  Using a little steam can help massage your curves flat.


Now pair up your squares again.  Mix them up a bit - don't pair the same two squares up with each other.  Again stack them right sides up.  The curves should line up too.  Cut another curve inside the previous curve.  See the photo for an example.


Pin and sew the same way as before.  Press.  Trim each block to 4.5" square and sew four squares together to make an 8.5" finished square.  I created Xs and O with my blocks, but you can arrange your 4.5" square in whatever pattern you like.


I made a few mistakes along the way with these blocks.  I found that cutting the curves too sharply (squarish) made them harder to sew.  In the photo below, the curve on the left is flatter and easier to sew than the curve on the right.


I mentioned that it's easier to sew the curve when the "inner" piece is on the bottom and the "outer" curve is on the top.  This allows you to see what's going on with the outer fabric and move things around to keep the seam flat.  Otherwise I found that the outer fabric will tend to pucker as you see in the photo below.


I used green fabrics in the blocks for my sampler quilt.  This time I made the inner curves a little rounder and the outer curves a little flatter than I did in the tutorial blocks.


I hope you try this technique!  It's a fun and easy way to sew curves.

I'm linked up with:
Late Night Quilter